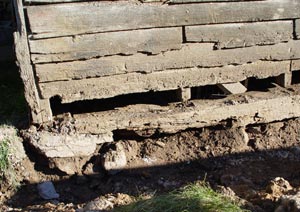
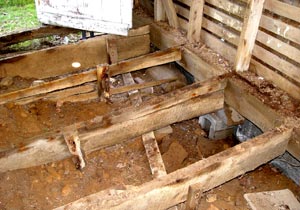
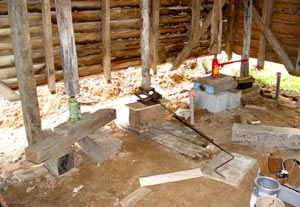
24 September 2003: The sill at the northwest corner was totally rotted out and the building was perched on loose stones that had shifted somewhat. What passed for floor joists is shown at right. They were sawmill slabs that were heavy enough in some parts but totally flimsy in others. Groundhogs had burrowed under the building and piled up dirt against the joists, which accelerated the rot.
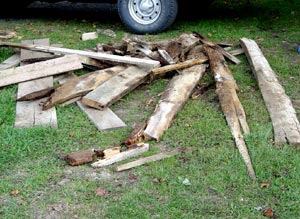
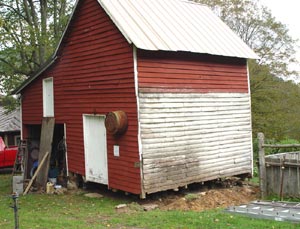
24 Sep: Once removed and taken outside the joists look like a pile of kindling, which is about right. 28 Sep: The building was then jacked up so the rotted sills could be removed. The old leanto had been attached at the transition from red to white paint. The building used to be white and was never repainted under the shed.
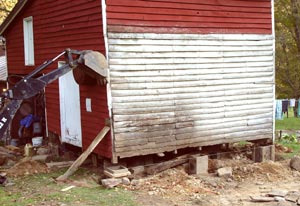
28 Sep: Jacks were placed inside, pushing on a beam placed against the second-floor joists. The building was lifted a little at a time until it was level all the way around. 6 Oct: It also had to be pushed sideways to return it as nearly as possible to square. Forms for concrete footers have now been built under the corners and the middle.

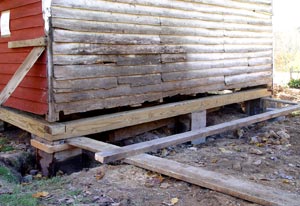
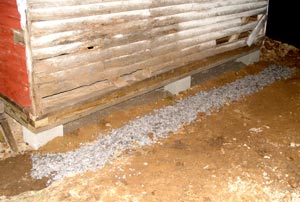
12 Oct: New sills were cut and fitted, then removed. 13 Oct: Concrete was poured into the forms, then the sills were replaced and secured with anchor bolts into the fresh concrete.

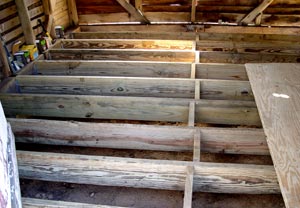
16 Oct: The concrete has hardened, the forms have been removed, and the building lowered and secured. Now the new floor can be installed. Pressure-treated joists are in place and one piece of plywood is laid.
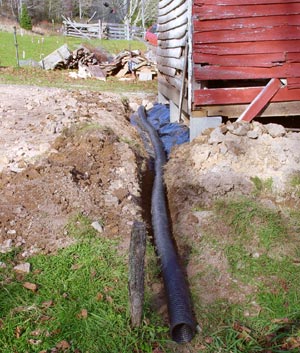
20 Oct: Despite using pressure-treated joists and raising the building above ground level, we don’t want water running under it, so slotted pipe was installed and covered with crushed stone to create a French drain. Grading keeps most water away and this catches the rest.
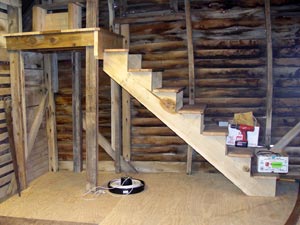

25 Oct: With the completion of the flooring and installation of stairs to the second floor, the tool shed is pretty well done aside from setting up a work bench and moving stuff back in. (Note the curvature of the studs behind the stairs. That’s real, not distortion in the photo.) Attention then shifted to the tractor addition. Here the posts are set in place as well as the beams to support the rafters.

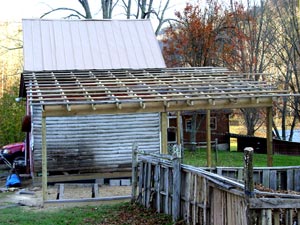
31 Oct: Perry Warner and Kevin Wimer are erecting the rafters. They helped with the project on and off throughout the 2003 season. 3 Nov: The roof deck is fully in place.
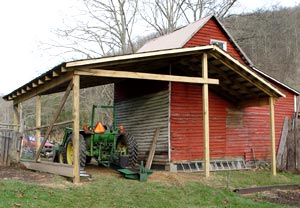
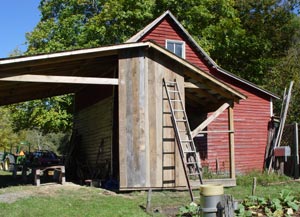
7 Nov 2003: The roof is now in place and the tractor can spend the winter largely out of the weather. This is as far as we got before stopping for the season. 4 Oct 2004: Eleven months later it’s back to work installing siding.
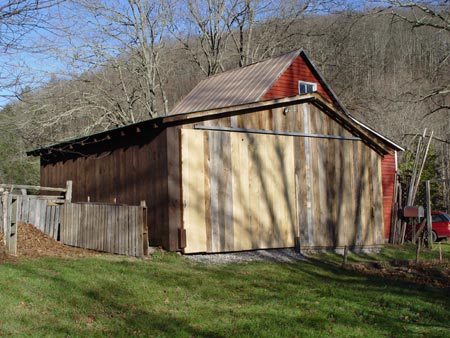
10 Oct: The siding is now done on two sides and lights have been installed. 12 Oct: Finally, siding is completed on the north side. Note the tapered join to the old building. That’s as straight as we could get it, about a ten-inch offset.
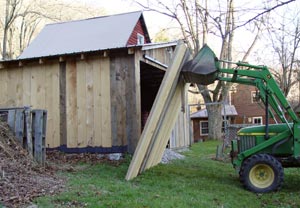
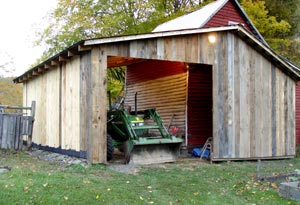
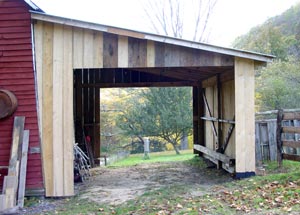
6 Nov: Hanging the door with a little help from Big John. The north side will remain open. 9 Nov 2004: Finished except for some paint, which will have to wait for next year. I did get one side painted but then had to turn to other things.
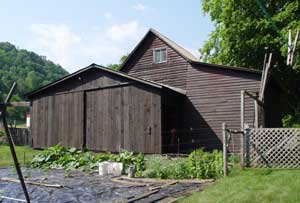
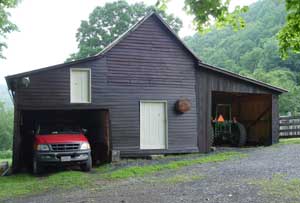
29 June 2005: Done at last! The painting is now complete, including the old part, which used to be red. The left photo is the south side, next to the garden, and the right photo is taken from the north.