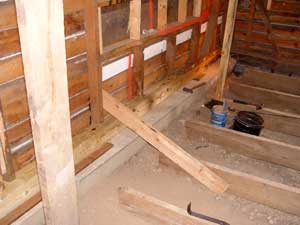
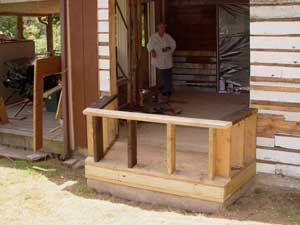
4 June: We took more of a break for Memorial Day than planned — I needed over a week to recover from a pesky virus. Today we have removed the concrete forms from the footer and placed a new 6x6 pressure-treated sill. 5 June: Now all new pressure-treated joists are in place. The old joists remain except along the north wall [left], where they have rotted away.

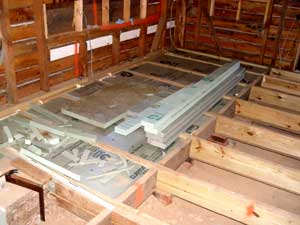
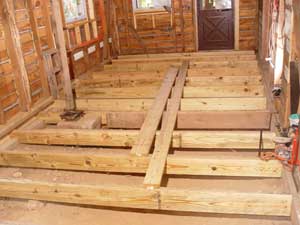
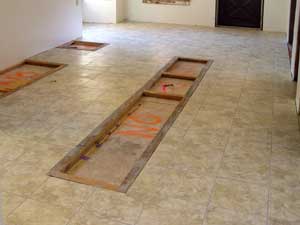
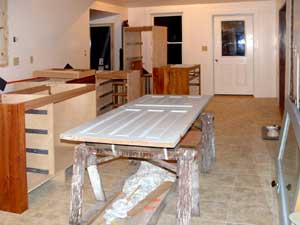
6 June: Shane is nailing in blocking between the joists while Art adds shims along the edge as needed. The old floor sloped in both directions and we have spent considerable effort to produce a level base for the new floor. 30 June: After another long break we are now beginning to place foam insulation between the joists. We will have R20 under the floor, which will conserve heat and prevent the plumbing from freezing. Over the past three weeks I have made hay and installed all of the plumbing and wiring that goes beneath the floor. This is time consuming work but does not show up in photos very well, hence the long time lapse.
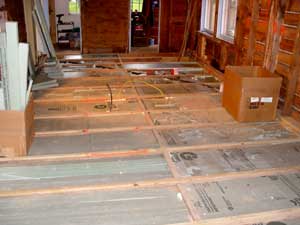
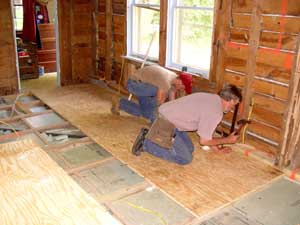
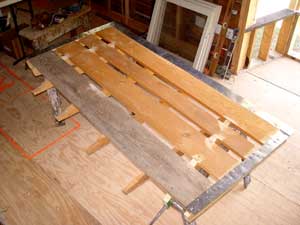
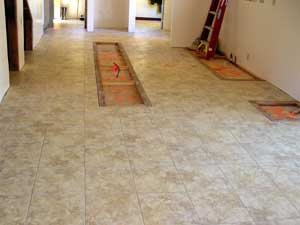
1 July: We have nearly finsihed with the insulation. 2 July: This morning we filled the last two bays with foam. Now Shane and Art are nailing the second sheet of plywood flooring in place.
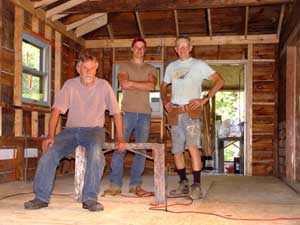
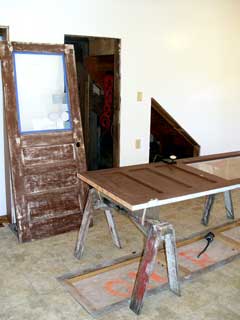
Here is our crew after finishing the floor in one day — Art, Shane, and John. 3 July: This morning we removed the large double window in what used to be the laundry room. The plan is to repair them and reinstall the left one in its original place. The right one will be used to replace the smaller window between the kitchen and porch, which appears at upper left in the 19 May photo of floor removal and again below, 8 July.
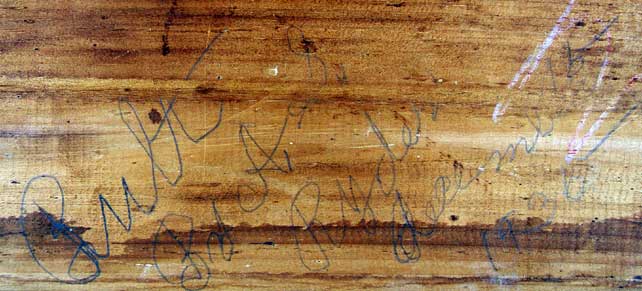
When we removed the large window we found this inscription on the frame. It is written in pencil and is a little hard to read. The contrast of this photo has been greatly enhanced in PhotoShop. It reads, “Bult by A. S. Ryder, December 16, 1936.” This was Char’s first birthday! We had been told that this one-story addition to the main house was built in the 1930s but this is the first proof of that.
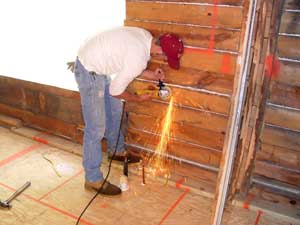
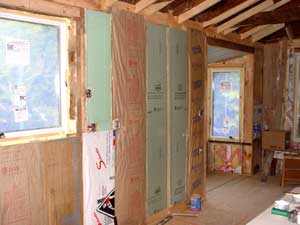
Shane is grinding away nails left protruding from the siding after a stud has been removed. 7 July: The rough openings for the old laundry-room window and the new casement over the sink have been framed out. Shane is now scabbing 2x2s onto the original 2x4 studs to create a six-inch wall, providing space for more insulation.
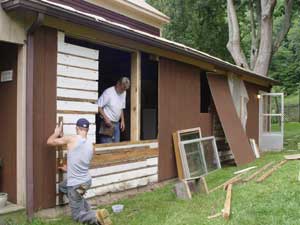
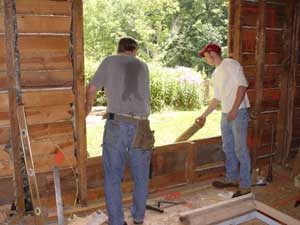
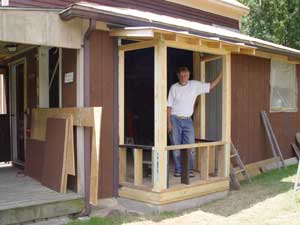
8 July: This morning I worked on repairing the old windows while Shane and Art framed up the opening for our large garden window. Here they are preparing to saw out the old siding. Later, the opening is complete and they have removed the small window to the porch and are now enlarging the opening to fit the old window from the laundry room.

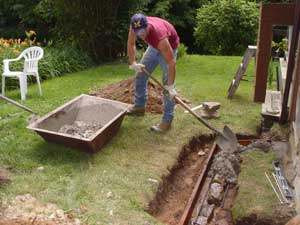
15 July: Shane has excavated for the footer for the garden window (left) and is mixing and pouring concrete (right). We placed large rocks in the trench to reduce the amount of concrete needed. The footer is close to the ground surface, in keeping with the rest of the house, but we added two runs of rebar so it is stronger than the main foundation.
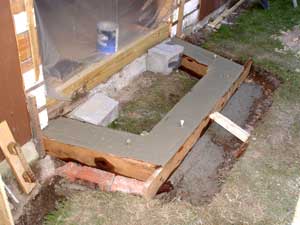
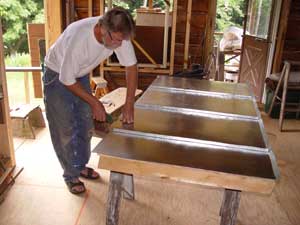
After the concrete was poured I returned to work on the two old windows we are restoring. Several rotted corners were built up with epoxy, one sill was replaced and everything primed. 16 July: This morning we poured a concrete sill on top of the footer, including anchor bolts and more rebar.
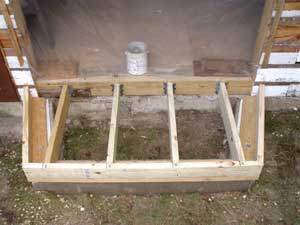
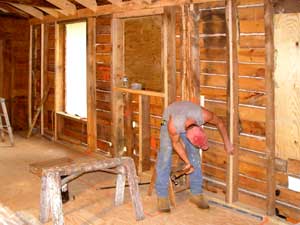
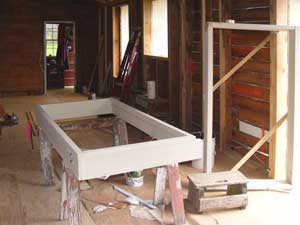
17 July: Here the joists for the garden window are in place. 24 July: After another short break we built the framing for the section of solid wall below the windows. The dark boards were recycled. They had been stained during an earlier renovation. We are reusing as much material as possible.
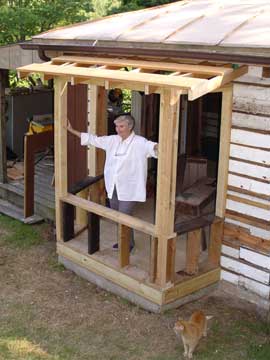
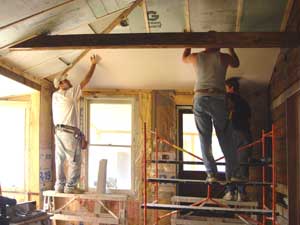
25 July: The garden window is now fully framed as Char inspects her new view. 27 July: Here the starter strips for the roof are in place, ready for the metal roofing. Because the new roof fits tightly under the gutter on the house, I designed it to be prefabricated and installed as a unit.
29 July: Here Art makes some final adjustments to the drip edge and then inspects the view after we set the roof in place. It installed without a hitch and is secured to the house with a dozen screws.

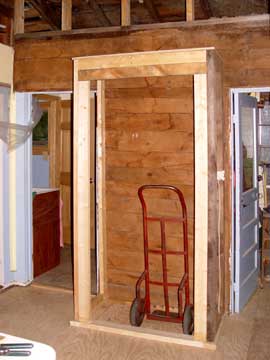
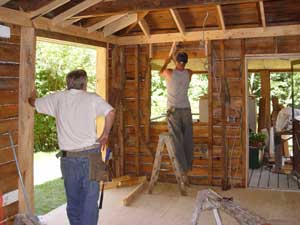
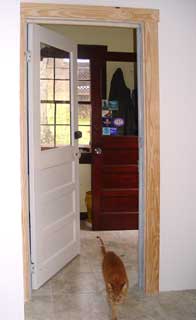
30 July: The window from the old laundry room is back in its place, now our entry room. The three studs just to the right form a small partition to set off the entry room from the kitchen. The window at the right edge of the photo will be over the kitchen sink. 31 July: While I continued to work on the wiring, Art built the framing for our coat closet. It is located between the entry door, right, and the laundry-room door at left.
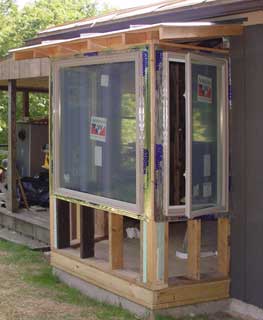
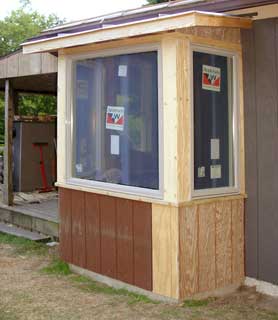
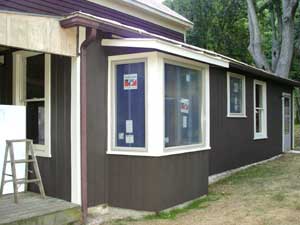
7 August: Our new windows arrived and have been installed. We like these Andersen windows much better than the Pella windows we installed in last year’s project. The side windows are casements, which can open. The large center window is a fixed pane. 10 August: The trim around the windows and the siding are now in place on the new garden window.
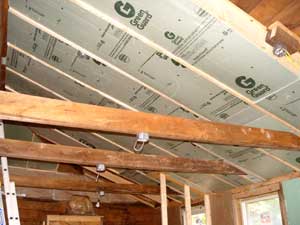
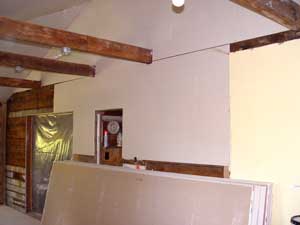
11 August: Wall insulation is now in place. We are mainly using R-19 fiberglass but some of it was thinner so we added a layer of the green foam. Some of the fiberglass bats were recycled so plastic sheeting was added where the vapor barrier was damaged. 14 August: Now we over halfway though the ceiling insulation. Here we are using six inches of the green foam, which is rated R-30.
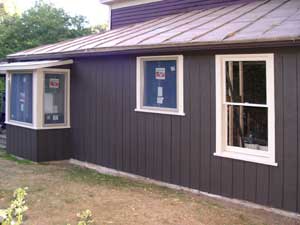
22 August: We have hired a drywall contractor — one job I don’t want to do myself — and await his arrival. Meanwhile, I have completed the exterior painting on this part of the house. The whole house needs to be painted but most of that will have to wait for next year.
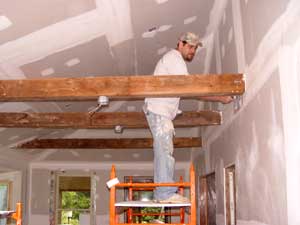
4 September: Drywall installation got underway this morning. Perry Moyers, at left, assisted by Jeff and Darren Vandevander are putting up the first sheet on the ceiling. Our job is complicated by the exposed beams and the fact that the old structure is not square or plumb. 5 September: By the end of the second day the ceiling is done and work has moved to the south wall.

8 September: Jeff and Darren are putting up the last piece on the west wall above the coat closet. Hanging is nearly done. 9 September: Jeff is taping seams on the south wall. The yellow section at right is part of the old wall, which we were able to leave. Doing this meant that we did not have to remove and reinstall the frame around one door and part of another. It also means that the many layers of old wallpaper underneath are left as an historical relic for future renovators to find.
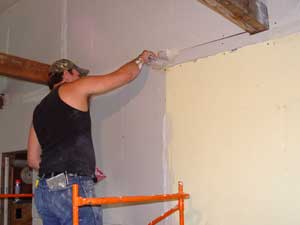
12 September: Perry is applying the second finishing coat of compound on the south wall. They have one final coat to go plus whatever touching up is needed, so they should be done by early next week. 16 September: And lo, it is now complete and the crew has left. The ball is back in our court with much work yet to do.
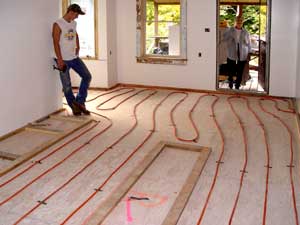
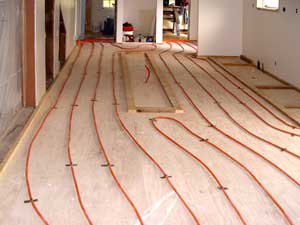
27 September: Shane and Char admire the newly installed heating pipe in the kitchen floor [left] and the view from the porch door looking west [right]. In addition, all of the walls have been painted with primer and about 2/3 now has a coat of finish paint. Art has been working on window trim. He has finished both of the old windows and started on the new window over the sink.
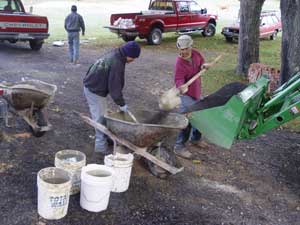
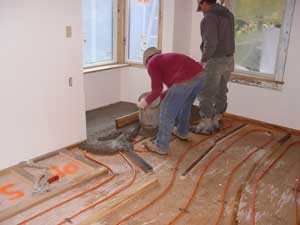
3 October: Today we poured the concrete to cover the heat pipes in the floor. Bill Harman’s crew mixes the mud outside and carries it in by the bucketfull while Bill does the final leveling.
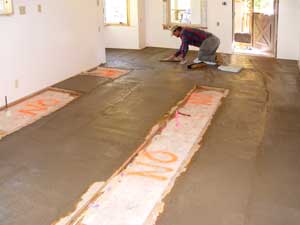
Later in the day Bill finishes the surface as the concrete stiffens. The areas where there is no concrete are where the cabinets will be placed. 8 October: Art begins the tiling process with a careful layout to align the seams with last year’s project in the laundry room.
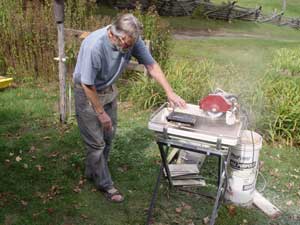

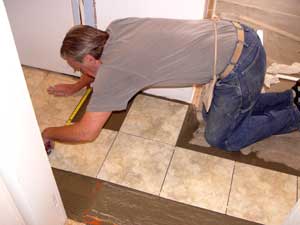
9 October: Art is cutting a piece of tile on his diamond saw, left, and the floor as we near the end of day two. It is a slow and meticulous process to maintain uniform seams and have each piece fit perfectly.
18 October: Art finished grouting the tile this morning. The new floor is shown here looking east [left] and looking west [right].
21 October: Today I am painting the two doors into and out of the mud room while Art is installing jamb extensions and casing to the door leading out onto the porch.
24 October: All three doors shown in the previous pair of photos are finished and installed but the “door shop” continues in full force. I am starting work on what will become the closet door while the new door into the stairway waits its turn. Compare the door onto the porch [background, left photo] with its former self [previous, right photo]. Most of the cabinets have been delivered and await installation next week. 25 October: At right, Rudy returns from inspecting the mud room.
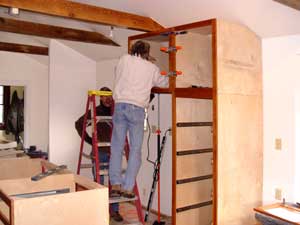
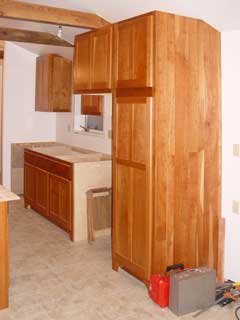
27 October: Byron Adams, our cabinetmaker, is beginning the installation process on the large pantry cabinet [left] and then applying the cherry paneling on the side.
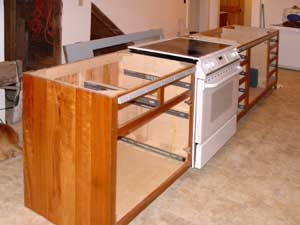
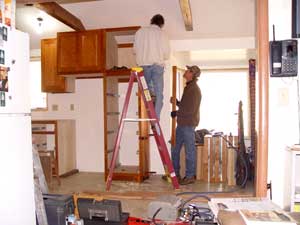
28 October: The island cabinet and the range are now in place. 29 October: John Golaschevsky of Kitchen Art Countertops is preparing a template for our counter as Byron continues to install cabinet doors.

3 November: The cabinets along the north wall are nearly finished, awaiting some trim at the top to tie into the ceiling and, of course, the countertop. Meanwhile, Art has been working on hanging doors. Here the pantry door is finished and the door to the storage closet under the stairs is ready for the trim to be painted.

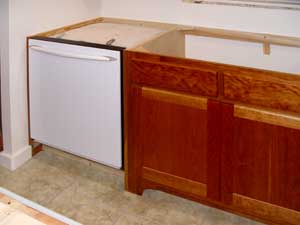
8 November: Left: Our point-of-use water heater under the sink. This is a four-gallon tank that plugs into a standard 110V receptacle. It is fed with hot water from our solar water heater so it will not run very much. The idea is to provide instant hot water at the sink instead of waiting for it to arrive via 40 feet of pipe from the other side of the house. Right: The new dishwassher. We have not had one before and Char is ecstatic.
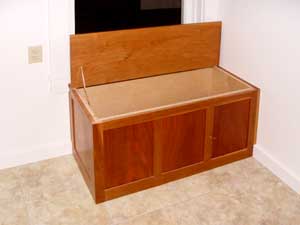
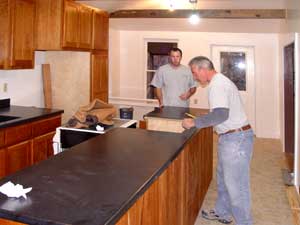
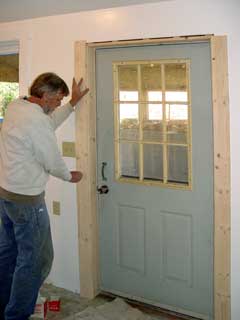
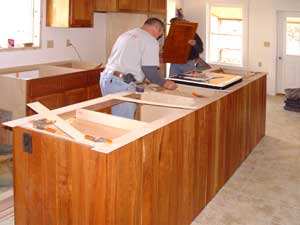
This boot bench is just inside the door. It provides a place to sit down to remove outdoor footgear and a space for storage. 11 November: Installing our shiny new countertops.
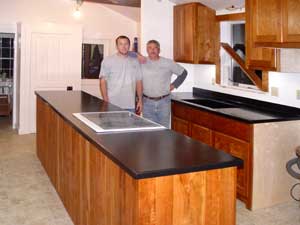

John Golaschevsky and son, Mark, of Kitchen Art Countertops pose after completing the installation. Their work is beautiful. 14 November: Our new kitchen is nearing completion. The icebox is in place and we are starting to move in dishes and small appliances. There are still a few things to do.
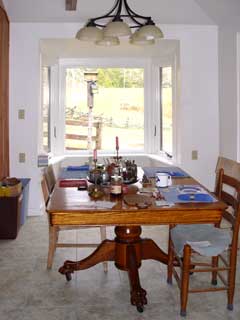
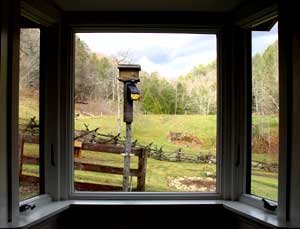
15 November: Our new dining room is already in use. We just installed the chandelier over the table. We greatly enjoy the view from our bay window. There will be some plants and things on the window sill but we have not yet decided exactly what to put there. Birds leaving the feeder frequently fly into the window. We have to figure out what to do about that.
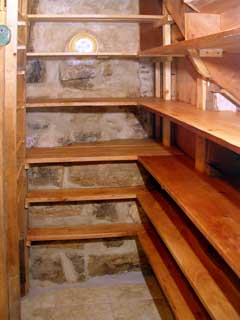
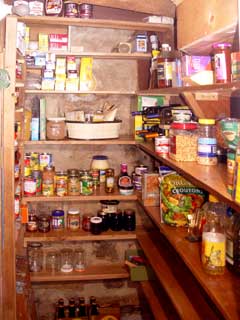
5 January 2009: Finishing the pantry shelves was delayed when my planer broke down in early December. Parts were not available and I studied the matter at some length before buying a new one. The planer was essential if I was to continue the shelves as I began, using all recycled lumber removed from the house earlier in the project. Most of the shelves are oak. Part of two of them are hard pine and there is one nice cherry board. The shelves are fitted around the stones of the old chimney. 10 January: The shelves are now stocked and we are calling the renovation project complete! There will always be some little detail to do but that falls under upkeep, not renovation. All of the tools have been moved back to the workshop. Now I am faced with getting them all organized and put away. It’s always something!

